
Get More Creative Bang for Your Buck!
Have you ever found the one? That perfect, sassy, adorable, or gorgeous design that just speaks to your soul? You put it on a tumbler, and it looks amazing. But then… the love affair is over. Or is it?
One of the best-kept secrets in the crafting world is just how versatile your digital design files are. You’re not just buying a single-use design; you’re buying a key to unlock a whole universe of creative projects. Our goal is to help you get the most possible value and fun out of every single file you purchase from us.
Today, we’re pulling back the curtain to show you how to take one design file and use it for all sorts of sublimation and craft projects. Let’s get started!
Your Guide to Smart Resizing
The core concept is simple: your digital designs are flexible. But resizing isn’t just about dragging a corner of the image. To get professional-quality results, you need to be a little strategic.
The Golden Rule: It’s always best to make a design smaller, not bigger. High-quality PNG files (like ours!) are made at a specific size and resolution (usually 300 DPI, which is perfect for printing). Shrinking them preserves that crisp detail. Trying to significantly enlarge a small design will lead to the dreaded “pixelation” (a blurry, blocky mess).
Pro-Tips for Perfect Resizing:
Measure Twice, Print Once
Before you do anything, get the exact dimensions of your sublimation blank. Use a ruler or calipers. Don’t guess! Write down the height and width. This is the most crucial step.
Check Your Resolution & Software Settings
This works a bit differently depending on your software. In programs like Adobe Photoshop or Affinity Designer, you should set your canvas resolution to 300 DPI from the start.
If you’re using Canva, it handles this automatically. For Canva users, the key is to ensure your design dimensions (in inches or pixels) are correct, and when you download, choose the “PDF Print” file type. This will export your project at the highest quality, ensuring a crisp, 300 DPI result suitable for sublimation.
Don’t Forget to Mirror!
For most sublimation projects on hard, opaque surfaces (like cutting boards, ornaments, or metal), you MUST mirror your image before printing. If you don’t, any text or asymmetrical parts of the design will be backward on the final product.
Next-Level Project Ideas
Ready for some real inspiration? Here are just a few ways you can repurpose your favorite Cute-n-Crafty designs, with some more tips sprinkled in.
 If you have… Car Coaster Designs:
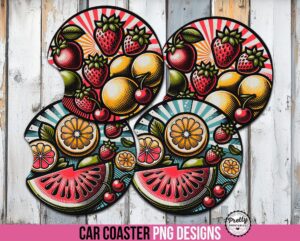
That 4-inch round design is a powerhouse of potential!
- Holiday Ornaments: Sublimate onto round ceramic or metal blanks. (Tip: Add the year using your software’s text tool to turn it into a beautiful, personalized keepsake.)
- Car Air Fresheners: Press the design onto a felt “smellie” blank and add your favorite fragrance oil.
- Keychains & Magnets: Shrink it down for acrylic keychains or round magnets. These make fantastic party favors or stocking stuffers.
- Jar Lid Toppers: Add a cute design to the lid of a candy jar or kitchen canister for a touch of custom decor or holiday gift giving.
If you have… Shirt, Tumbler, or Mousepad Designs:
These larger, high-resolution designs are your creative playground!
- Glass Cutting Boards: These make stunning and popular gifts. (Tip: This is where mirroring is essential! Since the design is sublimated on the bottom of the cutting board, you need to print it in reverse so it looks correct when viewed from the top.)
- Garden Flags & Door Mats: Welcome guests with a unique flag or mat that shows off your style.
- Tote Bags & Makeup Pouches: Put your favorite design on a bag you can carry everywhere, for instance, a Bible study tote. This works great for making custom trick or treat bags, too.
- Pillow Covers: Add a pop of personality to your living room or bedroom decor.
If you have… Pen Wrap Designs:
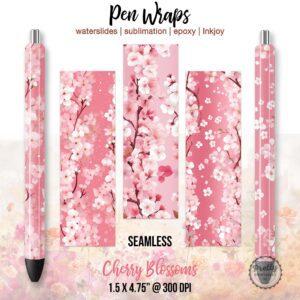
Those long, skinny designs can be adapted, too!
- Creative Cropping: Don’t feel like you have to use the whole wrap! (Tip: Use the crop tool in your software to isolate a single element, like one flower from a floral pattern, and use that as a smaller design for a keychain or magnet.)
- Vases or Candle Holders: Wrap a design around a glass vase or a candle holder for a beautiful decor piece.
- Printable Bookmarks: A pen wrap could make a super cute and unique bookmark – and vice versa. Just print on heavy cardstock and laminate!
Next-Level Crafting: Creating Coordinated Gift Sets
This is where you can really blow people away. Use a single design theme to create a matching set of items. Imagine taking one of our Clip Art packs and creating a stunning gift basket:
- A large element on a tote bag.
- A smaller, matching element on a keychain.
- A seamless pattern made from the elements on a tumbler.
- A “Hello” message using the theme on a garden flag.
It all started from one design pack, but the result is a thoughtful, professional-looking collection that you created.
We’re not just selling you designs; we’re handing you a box of creative LEGOs. Build something amazing!
When you do, we’d be absolutely thrilled to see it. Tag us on social media with the hashtag #CuteNCrafty to show off your incredible projects!